
Build A Better Tomato Cage
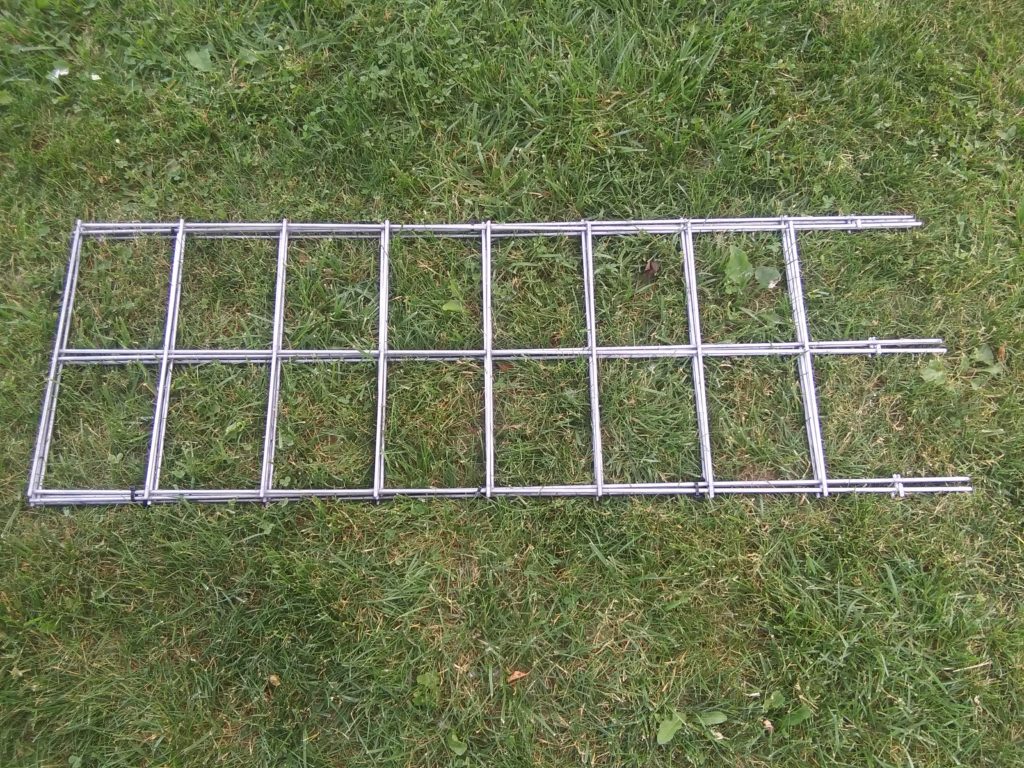
Most store bought tomato cages we have tried do not do the tomato plant justice. They’re made of a small gauge wire and are built smaller at the base and larger at the top. We have also tried concrete reinforcing wire homemade cages, which is definitely an improvement in wire size, but have had issues with the connecting welds breaking. We have also purchased a couple of heavier duty cages but these are nothing like the wire of a cattle panel. Hog panels could be another heavy duty option but hog panels are a little different in construction and are typically 34″ tall instead of 50″ like cattle panels, so they might work for a shorter tomato cage. We went with 16′ cattle panels. A cattle panel typically comes it two lengths, 8′ and 16′ both of which are 50″ wide. These are heavy duty fence sections made from 4 gauge wire (just under 1/4″ diameter) welded at the wire crossings.
A 16′ long cattle panel will yield two 16″ x 16″ x 50″ square or triangle tomato cages using the design covered in this article. The triangle version will have two sections left over. There is also some unused wire and these cages are not going to be the cheapest option available. At around $30 a panel this means each cage will cost about $15 which is something to consider before jumping into building these. The bonus feature in this design is that the cage is collapsible. At the end of the season the cage folds down to a fairly flat size (50″ x 16″ x 1.5″ish), taking up much less storage space. Since these will spend about nine months of the year in storage, the convenience of compact storage is a welcome departure from the fixed shape cages we’ve stored in the past.
Remove The Unnecessary Pieces
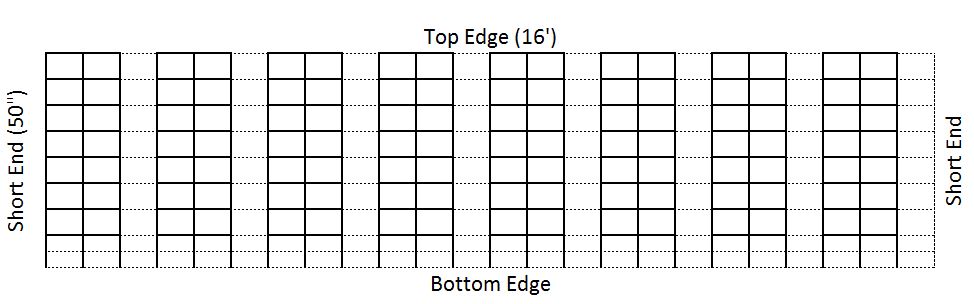

Removing the the unused sections of wire will yield eight cage sections, enough for two complete cages. Removing the bottom two wire sections will give 8″ of anchor wire. Removing an additional wire section from the bottom allows for 14″ of anchor wire in the ground but result in a shorter cage above ground. Longer anchor wire will also bend easier. The 8″ wire section in the ground is working well for ours.
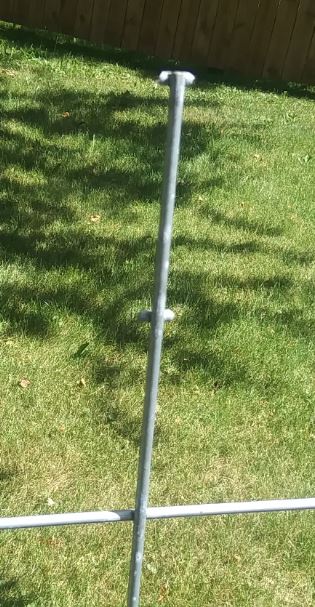
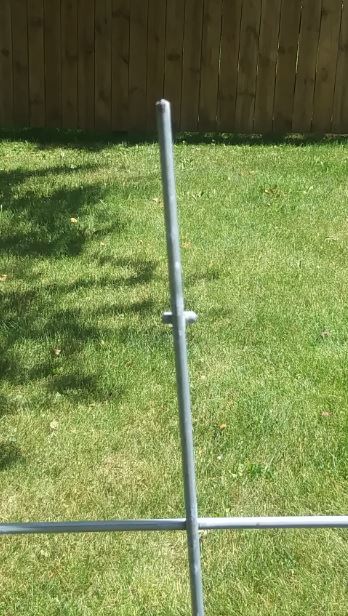
After removing the horizontal bars there’s still a nub. Removing the nub leaves a sharper tip to press into the ground.
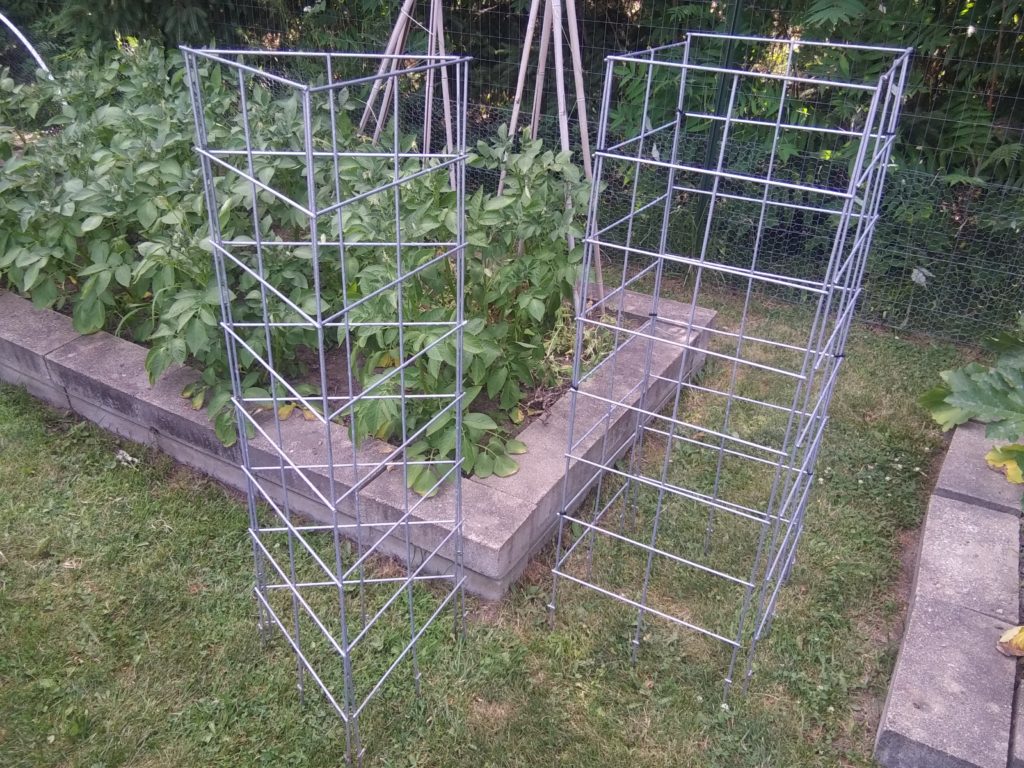
Shape And Size
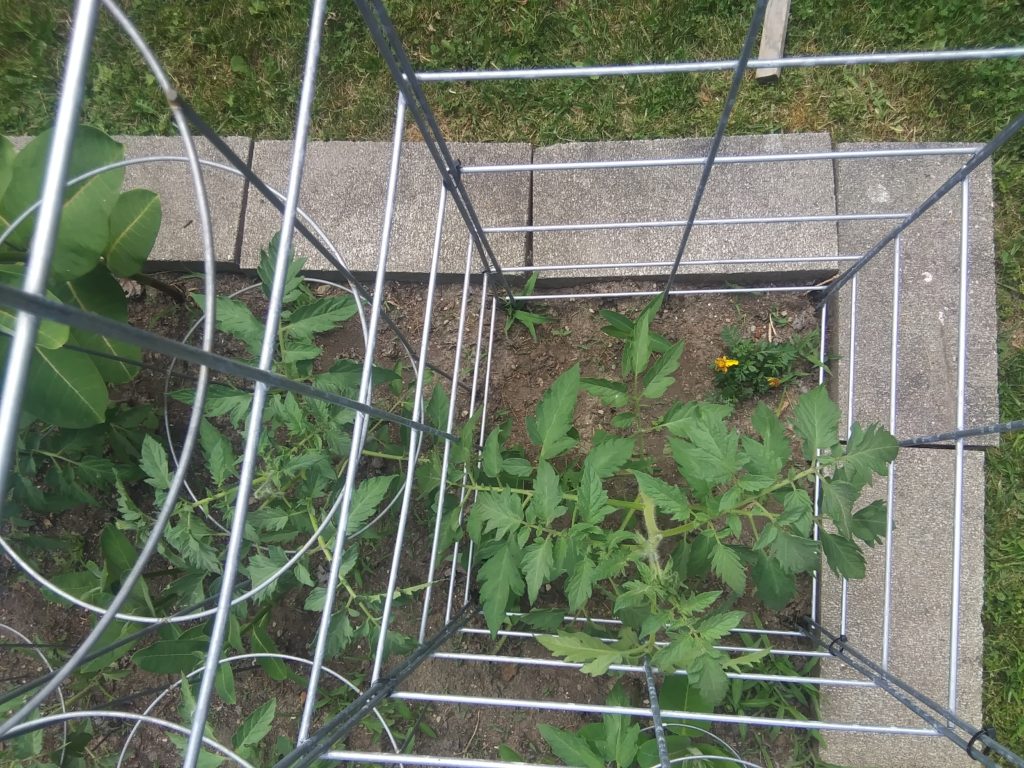
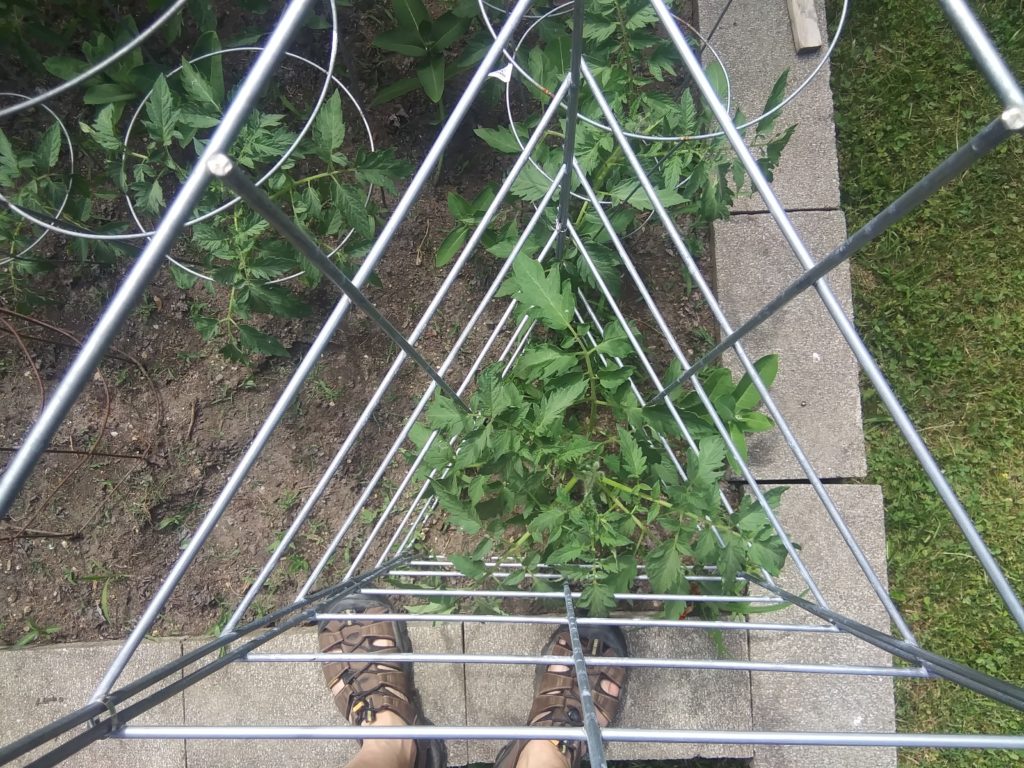
The sections can be arranged as a square or triangle. The 16″ x 16″ square configuration results in a cage with 256 sq. in. and the triangle will have half of that at 128 sq. in. By comparison the store bought round thin wire cages we have with a top diameter of 12″ are 113 sq. in., and the 15″ ones are 176 sq. in. We went with the triangle shape for one tomato plant and the square on another. Both are Beefsteak variety tomato plants.
Cutting Corners
There are a few different ways to cut the panel wire.
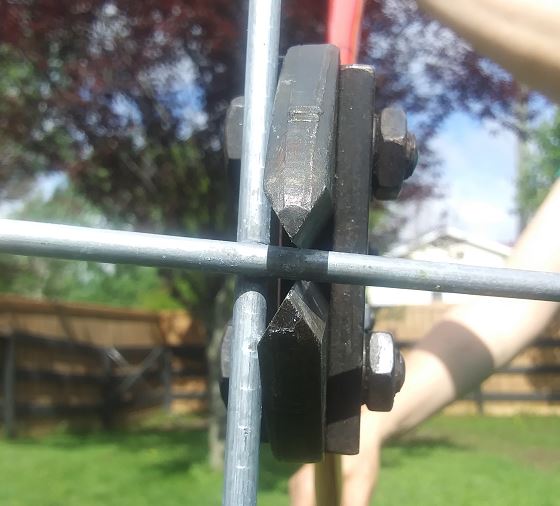
Bolt cutters are the fastest way to cut the wire and work well but they leave a short section of sharp wire at the cut. This cut can be sharp and care should be taken to remove the sharp edges. A file works well to knock off the edge reducing the risk of getting cut when reaching into the cage to harvest a tomato.
Other options are a metal cutting saw, like a hacksaw or reciprocating saw, or a grinder with a cutoff wheel. There are 10 wires to cut from top to bottom and the bolt cutters make quick work of the cuts.
Another advantage to the bolt cutters is their ease of use and portability. Transporting a 16′ cattle panel requires special considerations if you want to bring it home in one piece. With bolt cutters the panel can be cut into sections at the store and the small sections easily transported by just about any vehicle that can drive on a road. The sections easily fit in a back seat or trunk.
If you want to transport a full length cattle panel but don’t have a truck or trailer, there’s a guide on coiling up the panel here to fit it in a SUV, minivan, or possibly passenger car.
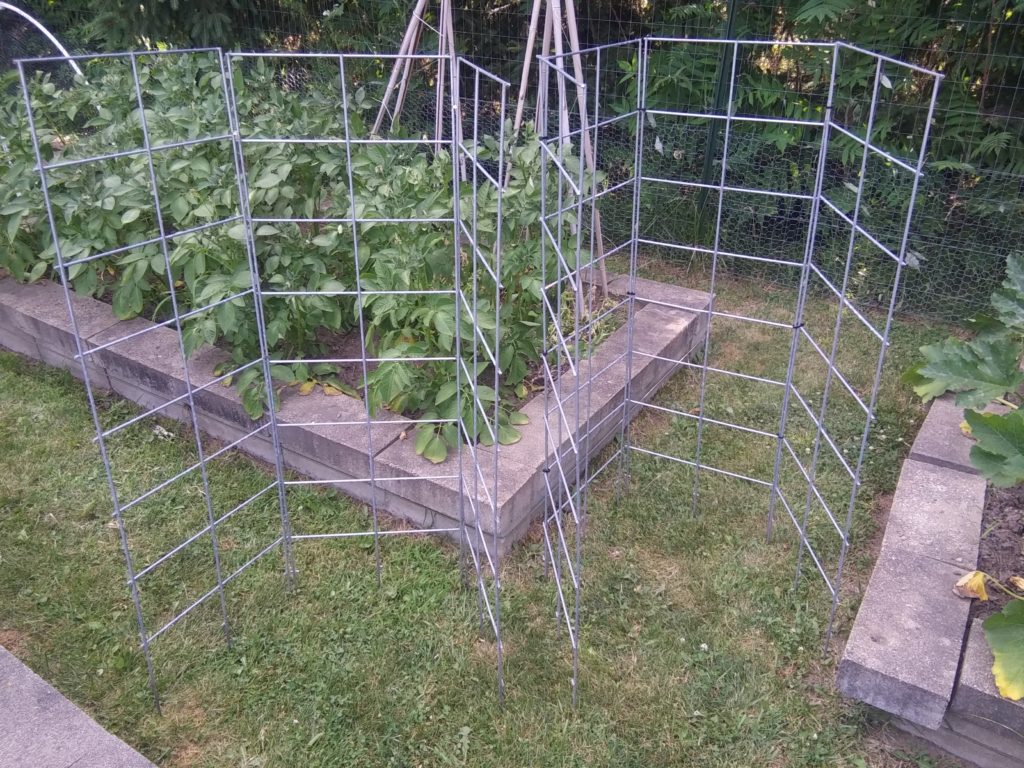
Corner Connections
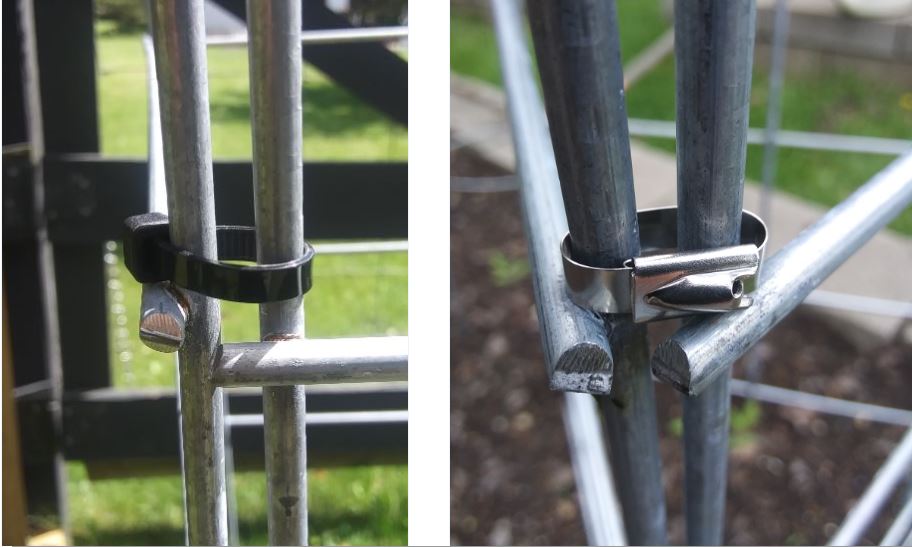
There are options for connecting the cage sections together. We experimented with plastic zip ties, stainless steel zip ties, and galvanized wire. We went with stainless steel ties on one cage and black nylon on the other. We also left the connection a little loose. The loose corner allows the entire cage to be folded flat for storage when not in use. The tighter the corner bars are cut the less width of a gap is needed.
Leave one corner open (no zip ties) so the cage can be folded flat. When in use this corner can be secured for the season with zip ties, string, bolt snaps or other methods.
All Done
Once the corners are connected your new heavy duty tomato cage is ready to do its job. This is our first year for these (2022) and there will be an update this fall reporting how they worked out. We will have an update with results and any modifications later this summer or early fall.
Storing When Not In Use
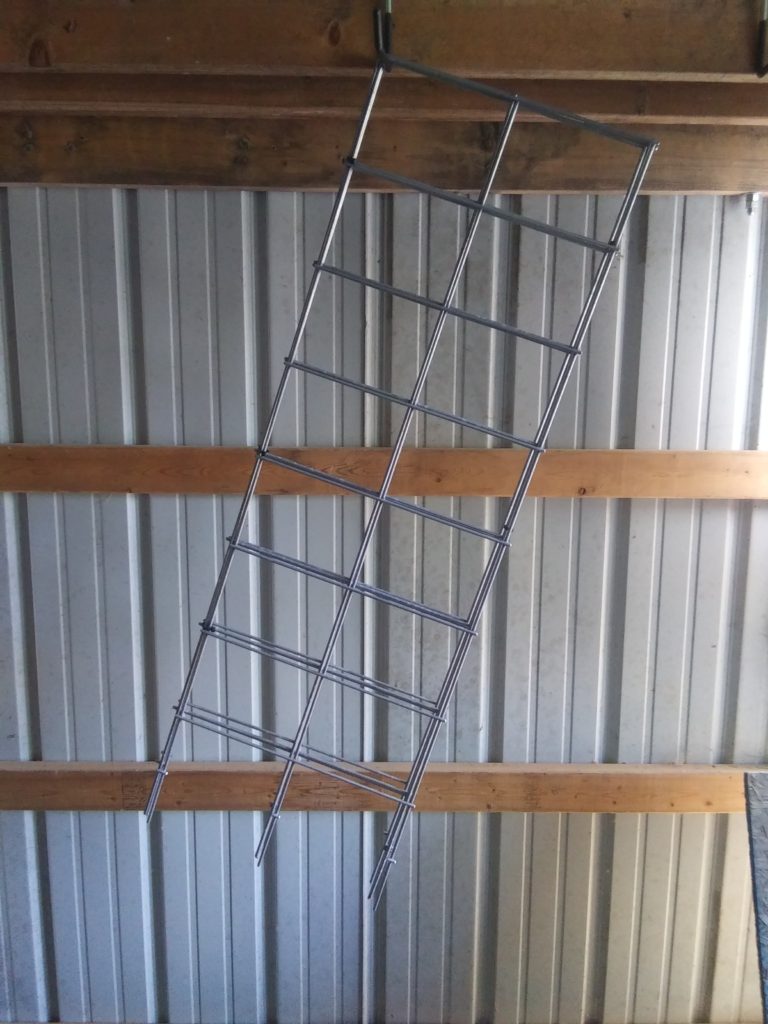

Disconnecting one corner allows the cage to be folded up for storage.

We used a quick link along one corner. These hold securely when the cage is in use and allow a quick disconnect means when it’s time to store the cages. One near the top is sufficient.
If nylon zip ties are used then snipping the ties along one corner and replacing them next season works as well.
Final Thoughts
This is season one for these cages so the long term assessment is a few years out. But, they are just tomato cages. Cattle panels last a long time as do metal ties. Even plastic zip ties are easily replaceable if they break. The cages stay in the ground, hold tomato plants upright and the folding feature works. I don’t anticipate any disappointments with these. At this point we’re just tending the plants and waiting for the tomatoes to ripen.