Time To Grow
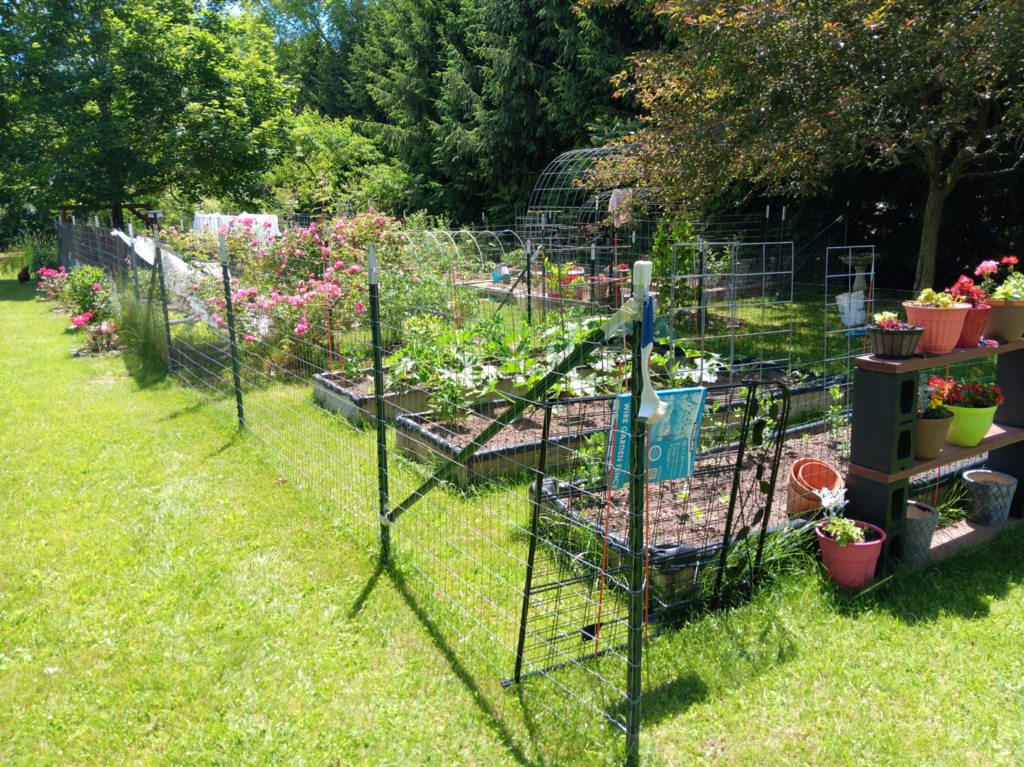
Recently we expanded our garden fence to include some new raised beds and our previously built arched trellises. I considered using something other than Wedge-Loc bracing hardware, but again, accepted the cost and went with them for the corner and gate bracing. I was able to re-purpose one that was no longer needed in its former location. Once cleaned up it was as good as new.
The Wedge-loc hardware is holding up great on the original fenced area and has earned the usage on this expansion. This time I’m trying out the horizontal configuration, as well as the angled and corner configurations used previously.
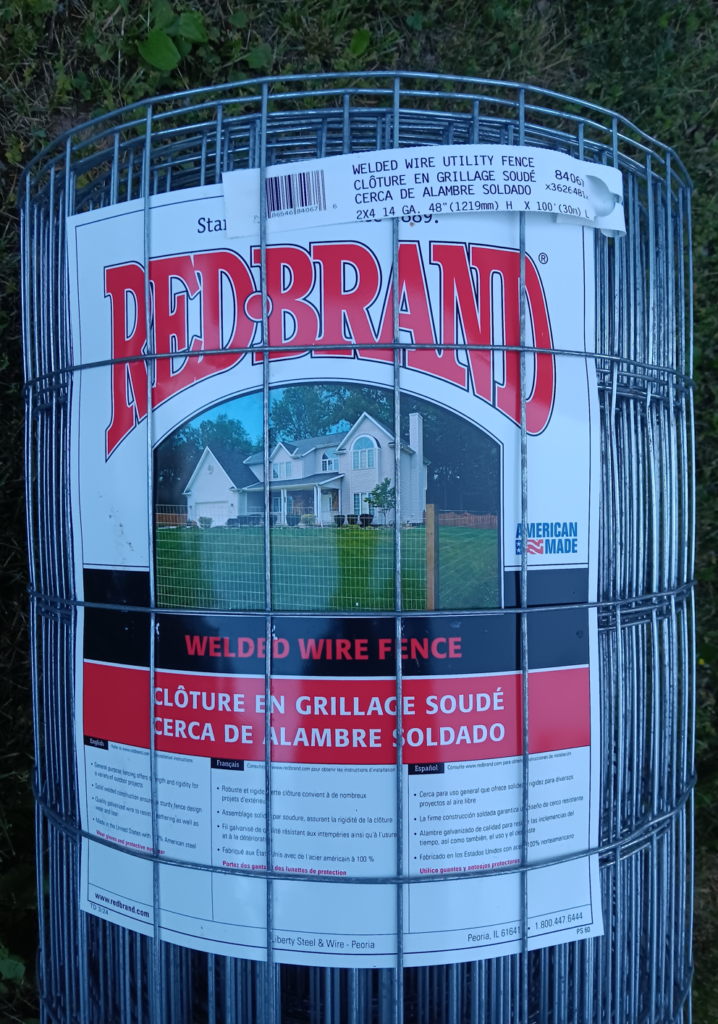
The fencing is 2×4, 14-gauge, 48″ welded wire fence, and the t-posts are in most cases 5′-6″ t-posts. The general rule of thumb is to use a t-post which is 24″ longer than the fence itself. A 6′ t-post would have been preferred but we had 5′-6″ post on hand.
On one side of the fenced area, we used 8′ t-posts since we have neighbors on that side and this section will also support some privacy screening material. More about that in a later update.
This is the fence we’ve had on our original garden fence, and it has held up for about a decade now with no issues. The wire fence provides enough tension to pull the Wedge-loc braced sections tight, locking the t-posts into the bracing hardware.
Laying Out The Post Location
We first determined where the gates and corners should go, then determined how many t-posts need to go between the gates and the corners. In other words, located the braced sections and then how many posts between these braced areas would be needed. Most references I’ve come across suggest a t-post spacing of 8′-12′ for the vertical support of the fence. I shoot for a 10′ spacing then add or subtract to get an even spacing.
We also have the fence pretty close to the ground to keep out rabbits and chickens. Using the string trimmer around the fence can be tricky since trimmer string and wire fence do not mix well. Typically, the trimmer string will break but sometimes the wire fence will bend or break. We have to be cautious when trimming not to get the string tangled with the fence.
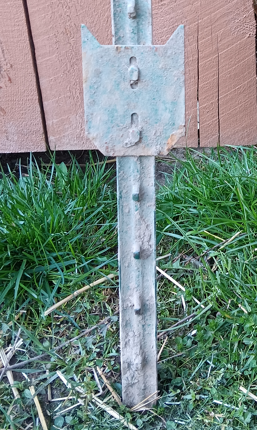
NOTE: The anchor blade on a t-post has an angled top section. This will penetrate softer soled shoes and stab the foot inside the shoe (or boot). Make sure the blade is buried sufficiently under the top of the ground to avoid this experience.
And it’s not a good idea to start the post in the ground by pushing the top of the anchor blade with your foot, as I found out.
Bracing The Needed Areas
Once the post locations were laid out, we installed the bracing hardware and bracing t-posts. The gates and corners got a combination of angle, horizontal, and corner bracing hardware.
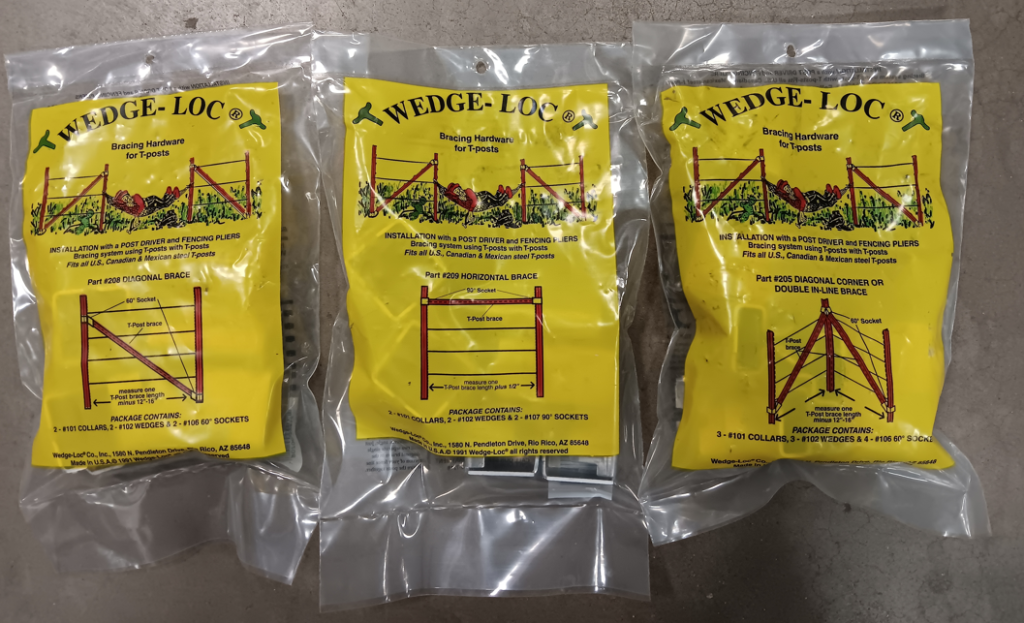
With these three arrangements, all the different bracing needs were met with the Wed-Loc brackets. All the Wedge-loc hardware installed in a similar manner as described below.
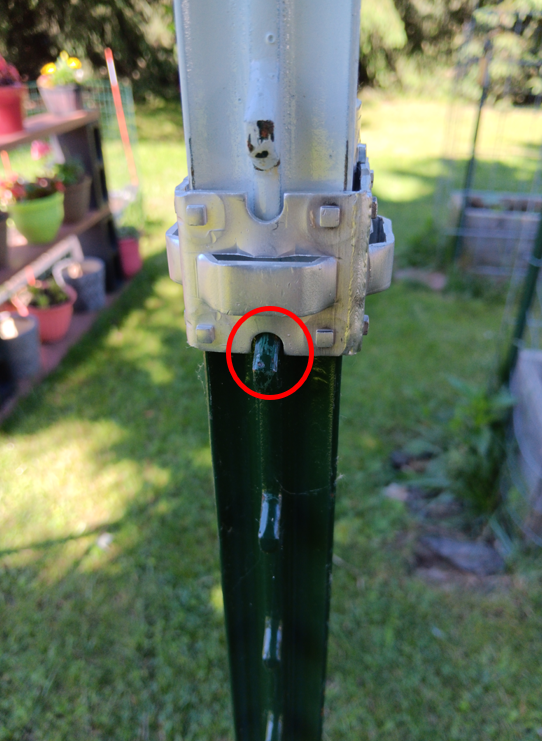
1. Slide the collar down until it’s resting on a post nub at the desired height.
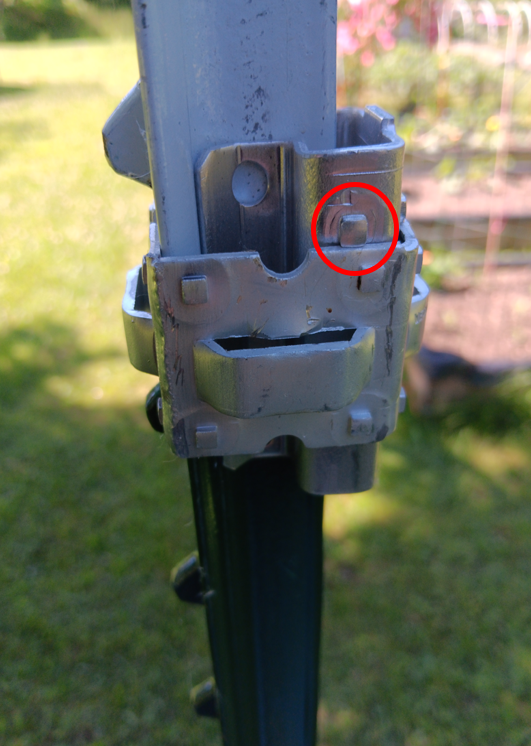
2. Slide the spacer down into the collar until its nub rests on the top of the collar.
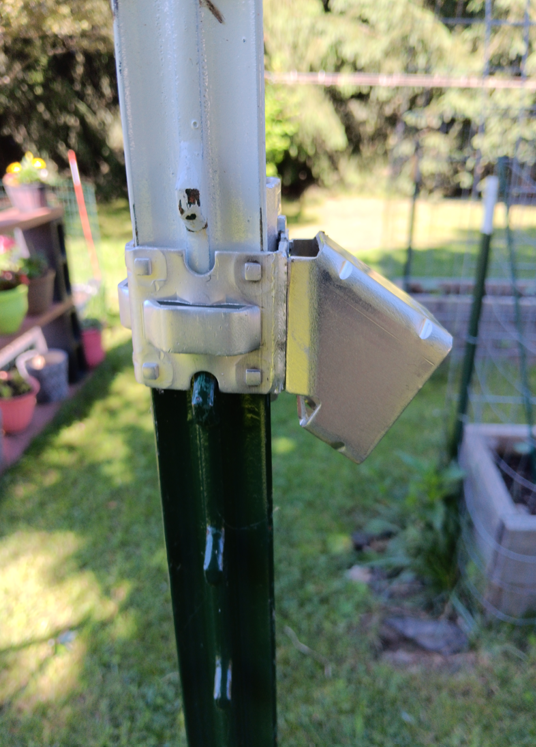
3. Insert the appropriate bracket. The bracket may not stay in place depending on the fit. The locking tabs in the next step hold it in place.

4. Use a flat blade screwdriver or similar tool to pry the brace tabs, locking it into the collar.
The lower side of the angle and corner bracing will be at the bottom of t-post. The bracket will simply sit in the collar and the t-post brace will force the bracket down into the collar.
Pulling The Fence
The welded wire fence we used is a fairly light duty fencing. It’s definitely more rugged than chicken fencing, but lighter weight than woven wire field fence, and definitely much lighter weight than a cattle panel. However, it is welded like a cattle panel so it’s not as flexible as a woven wire field fence. It’s the right weight for this project but needs to be manipulated a bit since it will be on some sloped ground.
Pulling the fence can be done a few ways, but for something this light and with the longest run being around 60′, we used ratchet straps to pull the fence taut.
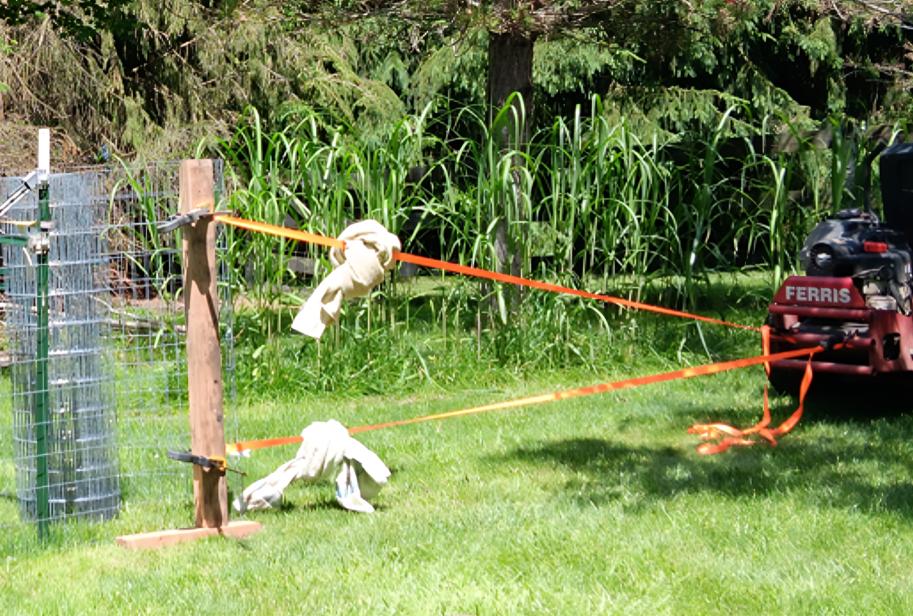
NOTE: The lawnmower is just an anchor point. The fence is tightened by ratcheting the straps, not by driving the lawnmower.
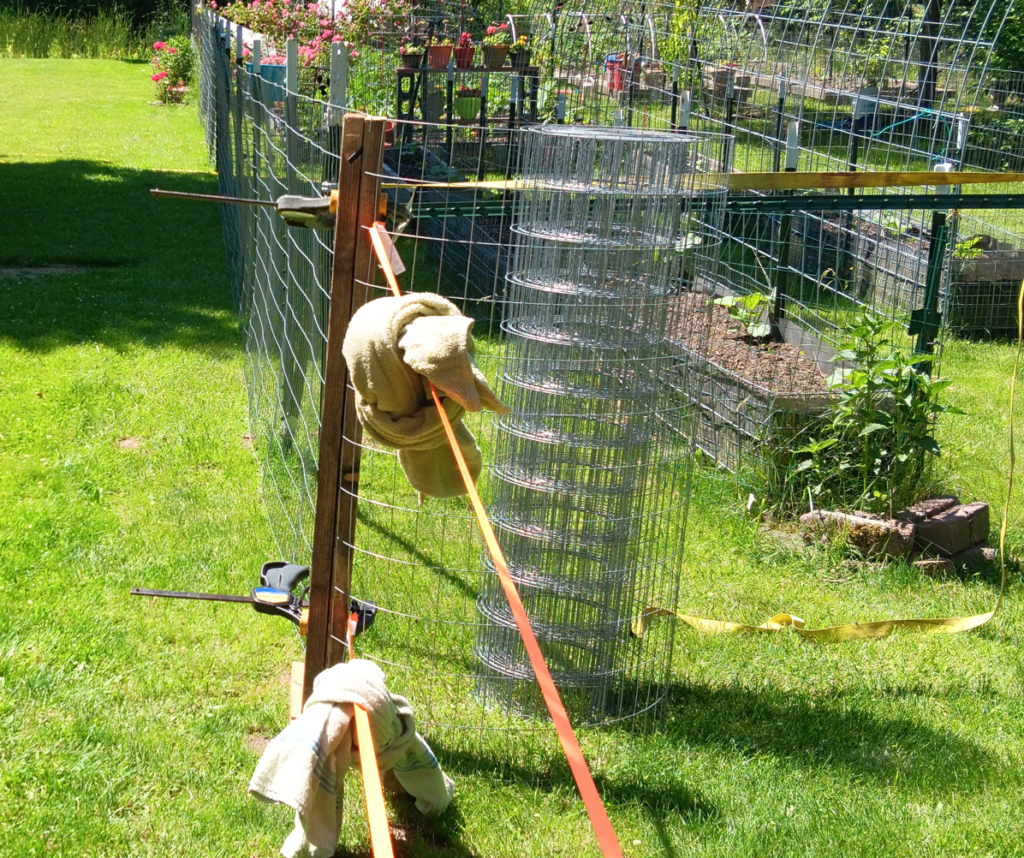
Sandwiching the fence between two boards (2x4s in this case) works well as a pulling point. Simply pulling on the fence wire itself will bend the wire. I’ve used this same technique on long sections of woven wire field fence, and it works good for that too. Longer runs of heavier wire may need more substantial ratchet straps or some other tensioning device.
The straps do most of the tightening, but the fence will get further tightened when the t-post wire clips are added. Tightness can be fine-tuned with the “Z” twists mentioned below.
Tightening And Adjusting For Ground Contours
Our original garden fence was on fairly flat ground; however, this new section is on sloped ground. There may be other ways to deal with this but below is the approach we used.
- Pull the fence fairly tight (see above).
- Along the length of the fence, get the desired height off the ground at the bottom of the fence and secure the fence to the t-posts along the length of the fence as you go.
- I try to get the fence vertically parallel with the t-post as much as practical. You may have to make adjustments to the fence tightness with the ratchet straps.
- The fence may look pretty bad at this point. It will most likely be a combination of loose & tight sections depending on the ground contours.
- Tighten the loose sections using the twist method described below.
Tighten the wire by making “Z” shape twists on the horizontal wires. A pair of pliers works well for this. The horizontal wires need these twists along the height of the fence. I like to keep these near the t-post, but they can be made anywhere along the fence. These twists essentially make the fence shorter in length on the strand of wire where the twist is made. To make the twist simply clamp a horizontal section of wire with pliers and twist.
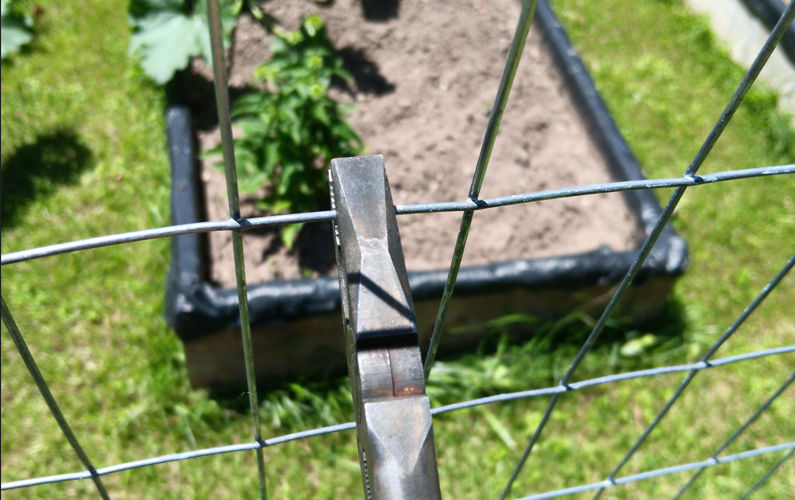
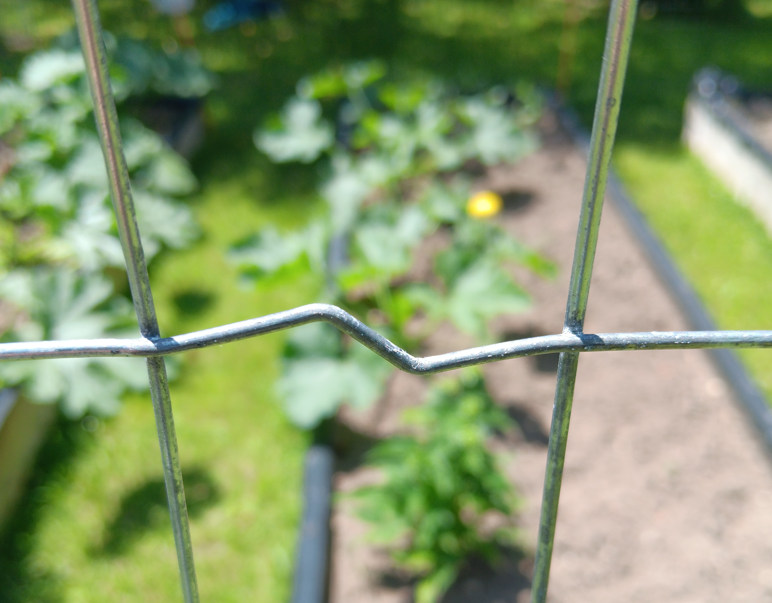
If your contour is sloping down (descending), then there will be more twists at the bottom of the fence and less as you work your way to the top.
If your contour is sloping up (ascending), then there will be more twists at the top of the fence and less as you work your way to the bottom.
Continue making the twists on the horizontal wire sections until you get the fence tightened to your liking. Once you’ve tightened a few horizontal wires you will see and feel how the fence reacts. Getting the desired fence tension is pretty intuitive once you get the hang of it.
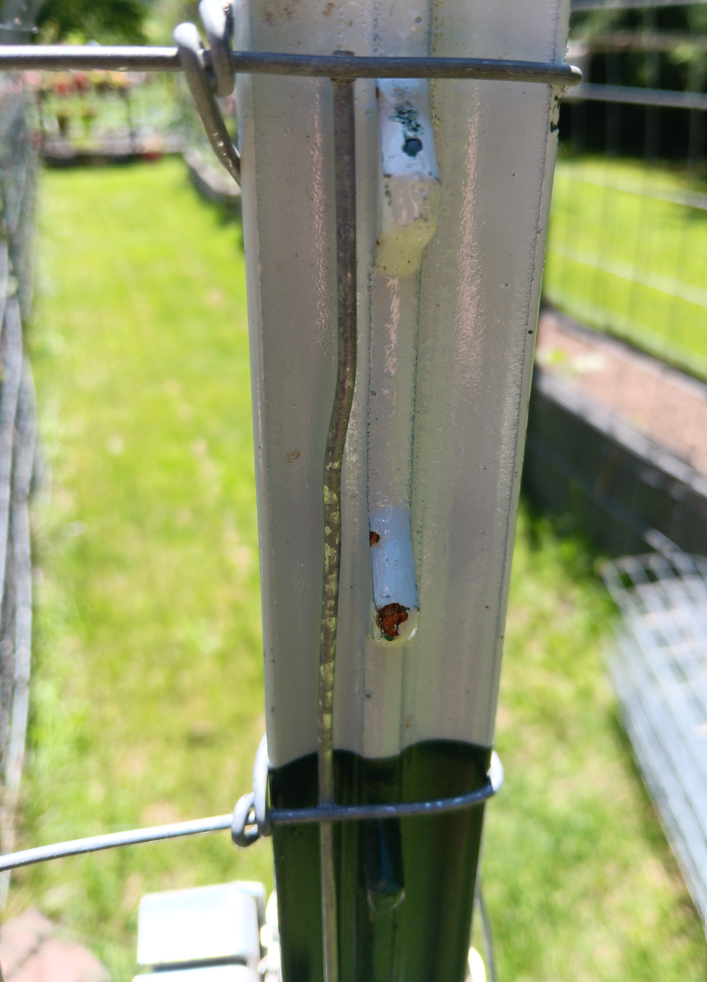
We used wire fence clips to secure the fence to the t-posts along the fence. However, at the end of a run we just wrapped the wire around the post and secured the fence wire to itself.
The Gate
Just like our original garden fence, we again used a section of decorative garden fence for the gates.
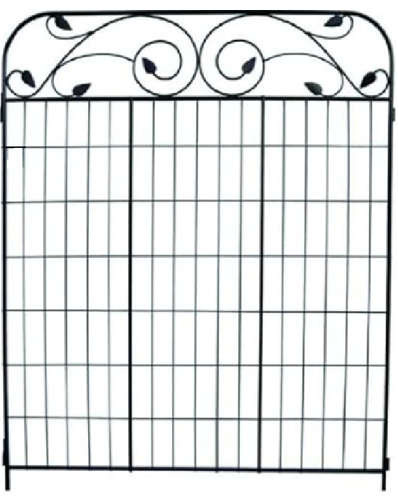
There are many variations of these types of fence sections both on Amazon and local stores. Looking at them in person may help decide if these work for you as a gate.
The Gate Hinges
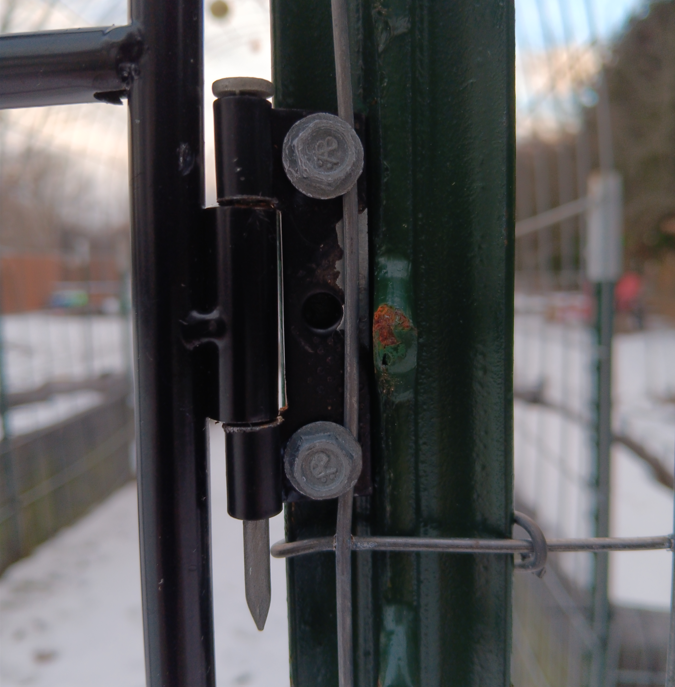
We used 3″ T-Hinges for the gate hinges. These have a hinge opening that works well with the cylindrical attachment section on the gate. The hinges will have to be disassembled for this use and only half of the hinge is used. I used speed screws to attach the hinge half to the t-post. Some hinges have a pin that can be reused for the gate-hinge attachment. Ours had a two-piece hinge pin design so I used a nail as the hinge pin to hold the gate.
The hinge had to be filed a bit to work with the gate as well as fit properly on the t-post.
Miscellaneous Details
The top of the t-post can get damaged by pounding it into the ground. This can leave cracked, bent, or chipped edges. Bent edges can be straightened in some cases, but sometimes the bent piece just breaks off.
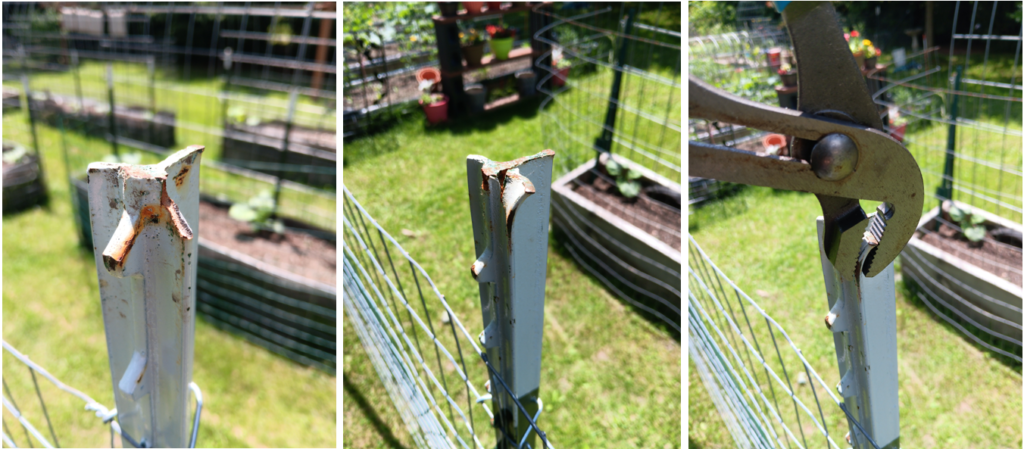
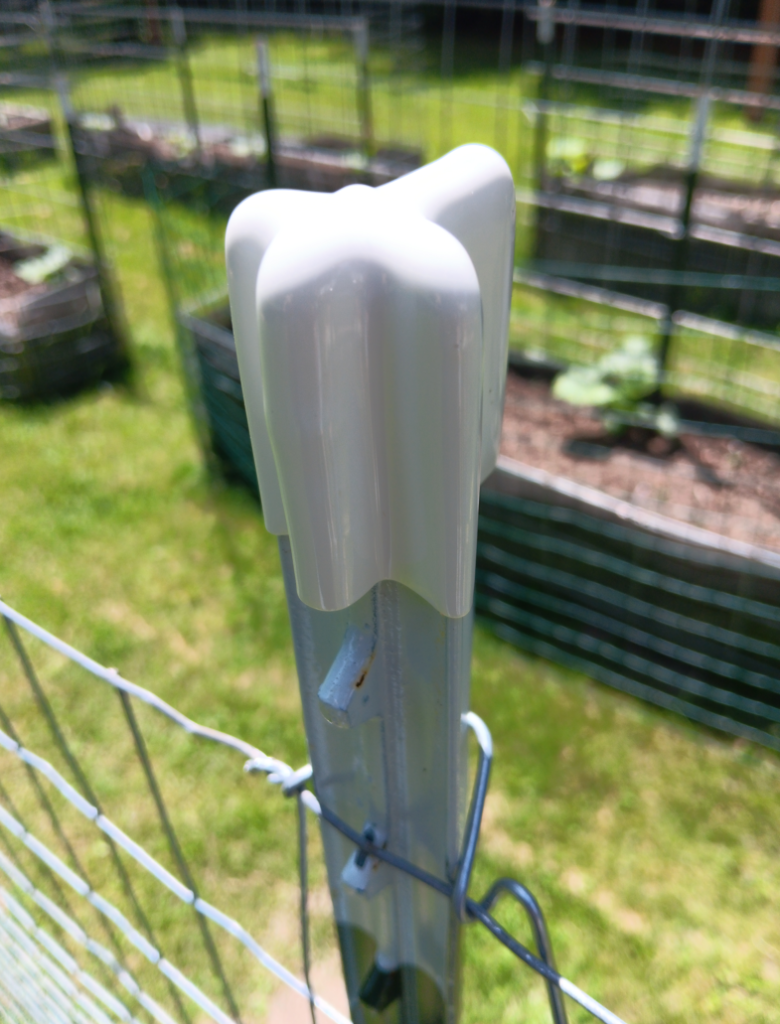
We’re trying these T-post caps to cover the sharp edges. These are simply vinyl covers that slide over the end of the post. Bent edges should be straightened as much as possible but the cap is flexible and forms to the shape of the post nicely.
This is a new item for us and the long-term durability is unknown at this point. They are currently undergoing their first Michigan winter cold weather test. They made it through the summer months with no noticeable issues.
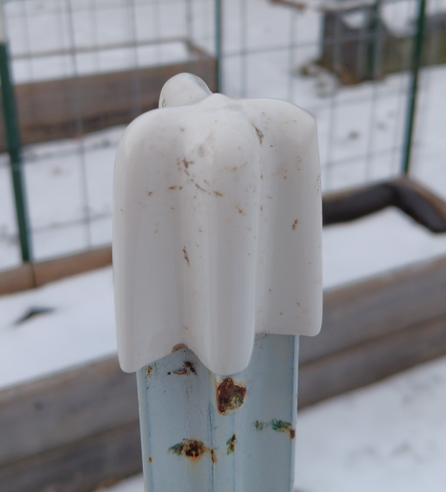
The covers are holding up well to the winter weather, although there seems to be some sort of mildew on some of them.
It’s too cold to worry about it now. There’ll be an update in the spring.
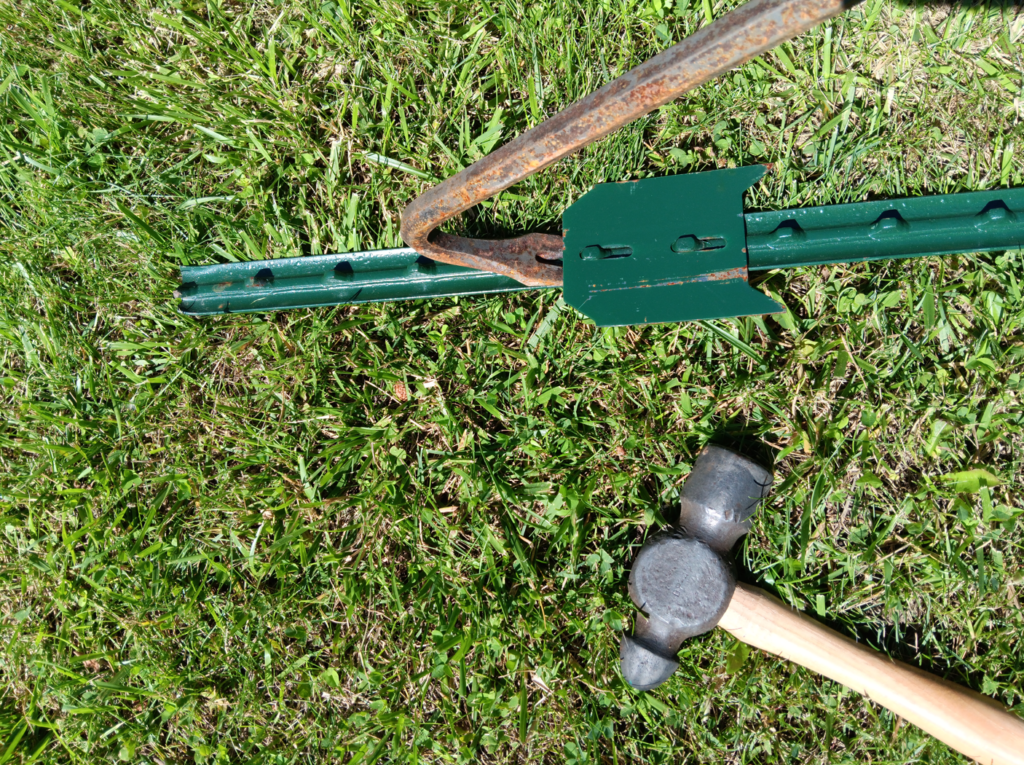
We also removed the anchor blade on the horizontal and angled bracing. This is the t-post that is either angled or horizontal between the vertical t-posts supporting the fence. The bracing is not in the ground. The Wedge-Loc hardware works with or without this blade, but we just didn’t want this on the bracing where it serves no purpose. The blades are pressed on the post and can be persuaded to come off with the proper tools. Some require more persuasion than others. I’m pretty sure the t-post nubs are peened to lock the blade in place, so the nubs here are a little wider than the others and also wider than the slot in the blade.
Status As Of Early 2025
The fence isn’t quite finished but it’s fully functional for it’s purpose, which again, is bascically keeping chickens and small animals out of the garden. More updates will be added as the final details get finished, hopefully this spring (2025).
Material Used
- Welded wire fence, 2×4 grid, 48″ tall. Length varies depending on fenced area
- T-post, 24″ longer than fence height is recommended
- Metal fence wire clips
- Gate of your choice, see below for the one we used
- Wedge-Loc bracing hardware
Resources
Below are links to some of the tools and materials. These are affiliate links and if you make a purchase through the links on our website we may earn a commission. Much of this can also be purchased locally at farm stores, home improvement stores, and hardware stores.
- T-post driver – the one I use (Ebay)
- T-post driver – available in both 12-pound & 18-pound versions (Amazon)
- T-Post wire clip – online alternative (Amazon). These worked well in addition to the ones purchased locally.
- T-post caps – white vinyl (what we used)
- T-Post caps – these work as well and are available in several colors. We have them install now but not as long as the others. Not sure if the color will fade or not.
- Gate – sold as a decorative garden fence section
- Wedge-Loc braces – corner (model 205), angle (model 208), horizontal (model 209)
