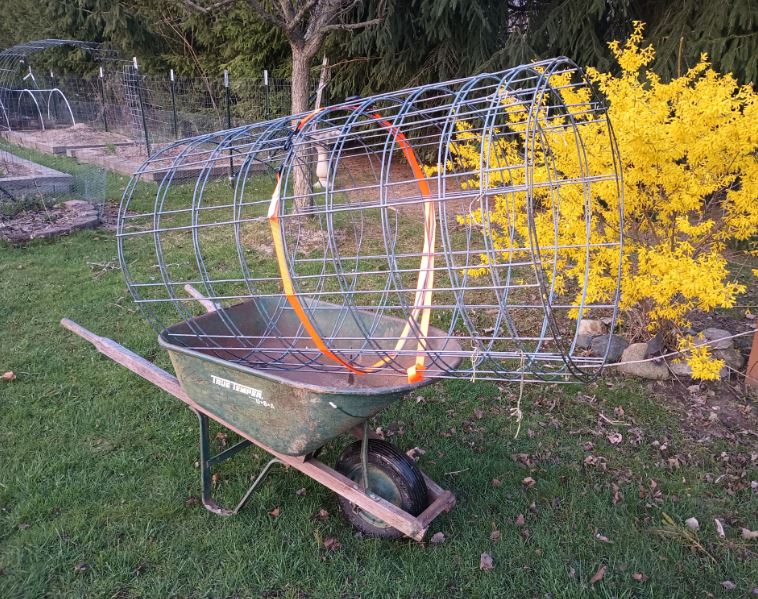
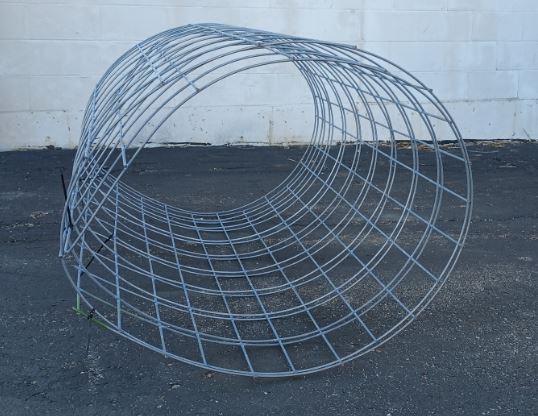
Transporting a 16′ cattle panel without a pickup truck or trailer can be a challenge but it doesn’t have to be a problem. It does though take a little planning as well as a bit of muscle to get the panel into a coil small enough to fit into a passenger vehicle. A cattle panel can be rolled along its length into a diameter small enough to fit into many small SUVs and possibly some cars, depending on door opening size. It will most likely get a curved memory formed into the panel but that is easily undone once the panel is at its final location.
A Little Math
Rolling the panel along it’s length will create a panel coil. Placing one end at a specific cross grid provides a specific coil diameter. Although this approach is based on the formula for the circumference of a circle, the panel coil will not be a perfect circle, but it’s close enough.
Circumference = 2 x Pi x radius.
But we are more concerned about the coil diameter rather than the radius so the formula can be written as Circumference = Diameter x Pi. Or, Diameter = Circumference / Pi.
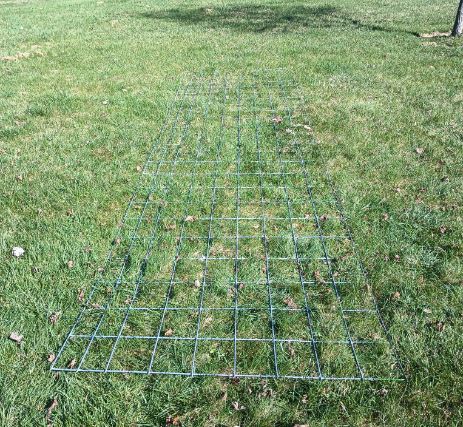
Grids in a cattle panel have 8″ spacing along the length of the panel.
So, at grid #12 the diameter of the coil = 96″ / 3.14 which equals 30.56″.
Choosing a specific cross grid is essentially choosing a circumference in increments of an 8″ grid spacing. Depending on which cross grid the end of the panel is placed at results in a coil diameter as shown below for coil diameters of about 30″ to 48″.
| Grid # | Diameter | Circumference (Grid # x 8) |
| 12 | 30.56″ | 96″ |
| 13 | 33.10″ | 104″ |
| 14 | 35.65″ | 112″ |
| 15 | 38.20″ | 120″ |
| 16 | 40.74 | 128″ |
| 17 | 43.29 | 136″ |
| 18 | 45.84″ | 144″ |
| 19 | 48.38″ | 152″ |
Or, in diagram form:
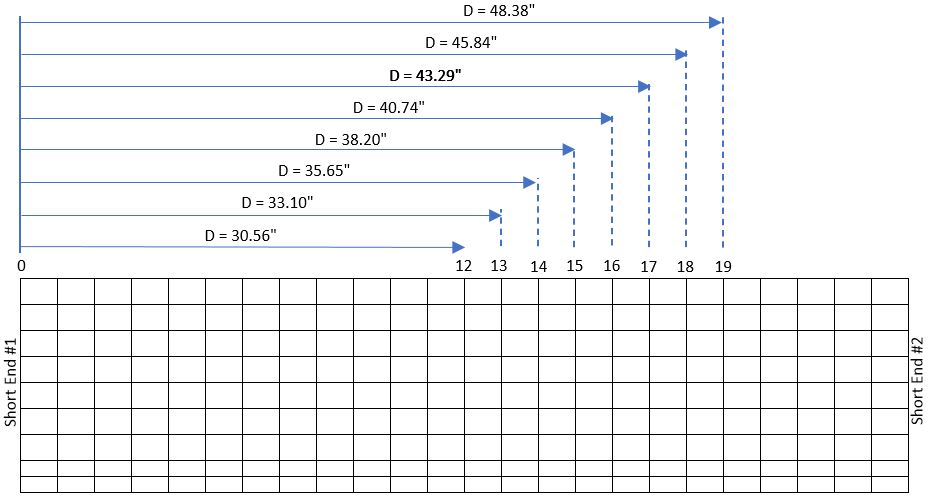
No matter how much care is taken while rolling the panel coil it will not be a perfect circle. Choose a cross grid one diameter size smaller than needed. So, if a 36″ diameter coil is what will fit, choosing cross grid #13 instead of #14 may save some frustration while loading the panel into the vehicle.
For the last panel I took home this way I used cross grid #12 which had an average diameter of just over 31″ instead of the 30.56″ from the calculation. The circumference was just under 100″ instead of the 96″ from the table. The small SUV had a rear opening of just over 32″ at the door. The panel went in with no problem.
Rolling The Coil
A step-by-step approach quick overview.
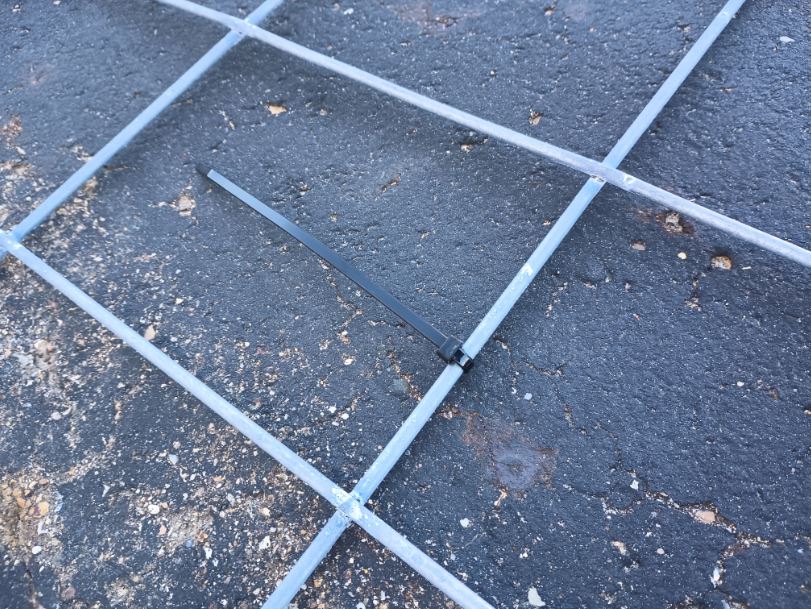
- Have 6-8, 8″ zip ties readily available
- Lay the cattle panel flat on the ground
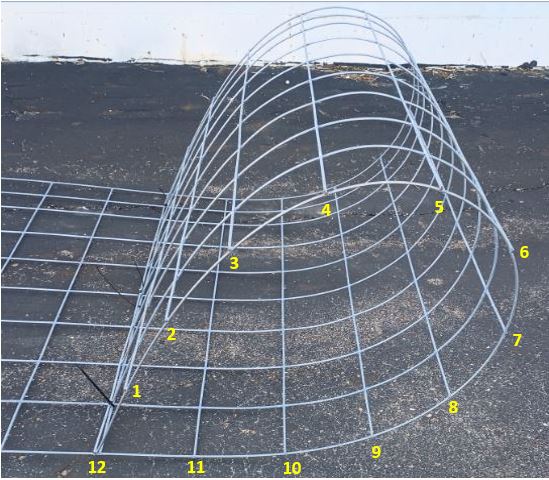
- Mark the cross grid for the desired diameter coil
- Loop short end #1 over to the marked cross grid and secure with 2-3 zip ties.
- Once the initial “loop” is made, roll the panel toward short end #2 until the entire panel is coiled and secure with 2-3 zip ties.
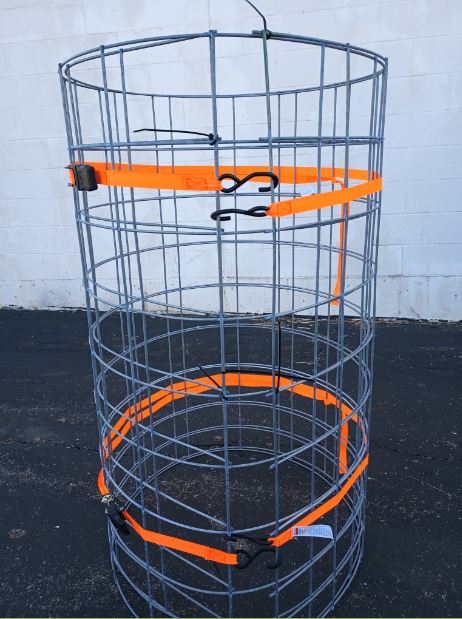
- Use ratchet straps to bind the coil.
Step 1: Have 6-8, 8″ zip ties readily available.
8″ zip ties work well for securing the ends of the panel. The length isn’t so important but this length is strong enough to hold the coiled panel without breaking. Longer (thicker) ties can work too. Just don’t use too thin of a tie and risk it breaking while working with the panel.
Step 2: Lay the panel flat on the ground.
Laying the panel flat on the ground provides the best layout for the rolling.
Step 3: Mark the cross grid for the desired diameter coil.
Reference the chart or diagram above for choosing the cross grid. The selected grid may roll with the panel initially so the actual panel grid needs to be marked, not the ground next to the grid. A piece of tape or another zip tie works well.
Step 4: Loop short end #1 over to marked cross grid and secure with 2-3 zip ties.
The loop will probably not be round and will have flat spots. This is a good time to press on the loop at any sharp bends to form the loop into more of a round shape.
Step 5: Once the initial loop is made, roll the panel toward short end #2 until the entire panel is coiled and secure with 2-3 zip ties.
Go slow and take care to keep the coil as round as possible which will reduce the possibility of making sharper bends in the panel wires. Rolling the coil toward you while moving backwards allows you to use your feet to help with the rolling by pressing on the panel where needed. Also, when you get to the end of the panel it’s easily reached for the final zip ties.
Step 6: Use ratchet straps to bind the coil.
After binding the coil and snugging up the straps the zip ties can stay in place or be removed. By removing all the zip ties the panel can be coiled a little tighter with the ratchet straps.
The cattle panel coil is now ready to transport. A typical cattle panel weighs about 32 pounds and is unwieldy when carried as a panel. It weighs the same in coil form but is much easier to carry and maneuver around.
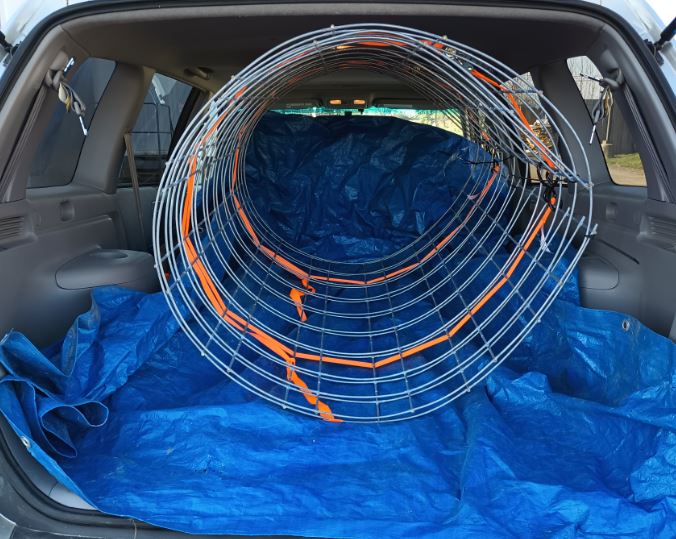
I like to use a tarp to keep the panel metal from damaging the interior. Keep in mind that the door opening may not be the shortest height if the roof interior has contours or the seats do not lay flat.
Unrolling The Coil
Once the cattle panel is at its destination it is now time to undue all the effort of making the coil. Take care when cutting the zip ties and releasing the ratchet straps since the panel will want to spring back to a more open coil diameter. The panel will have a curved memory in it and will not lay flat.
Place the panel concave face down on as flat an area as possible.
Working on the high spots and walking on the panel will return it to a “like new” condition. Every panel we’ve purchased has some wave(s) in it and are never perfectly flat.
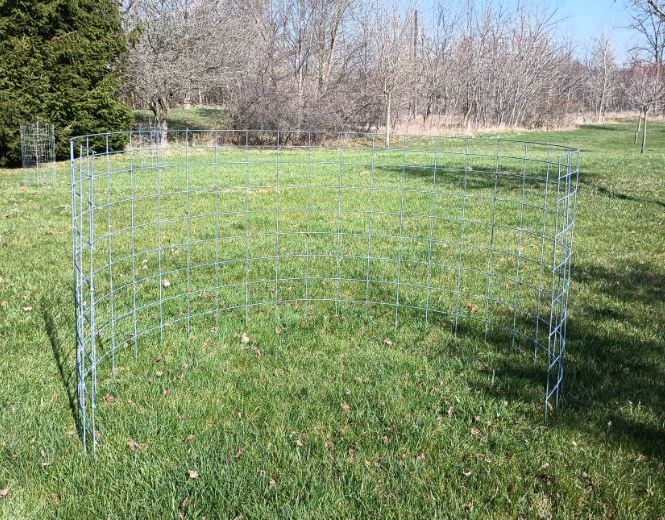
Good Enough For What’s It’s For
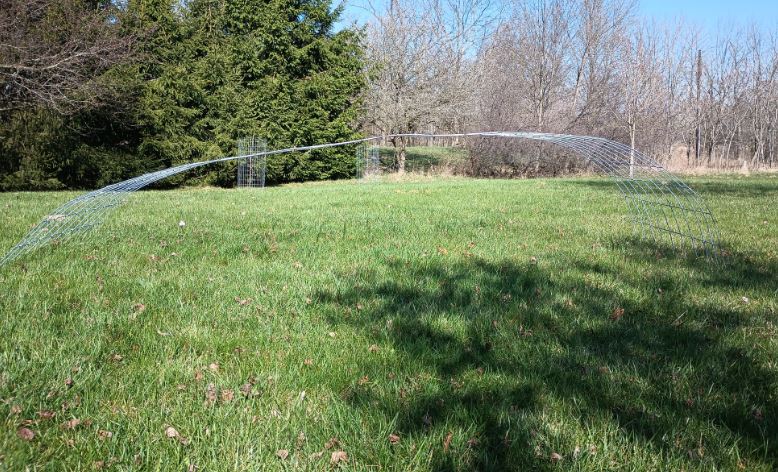
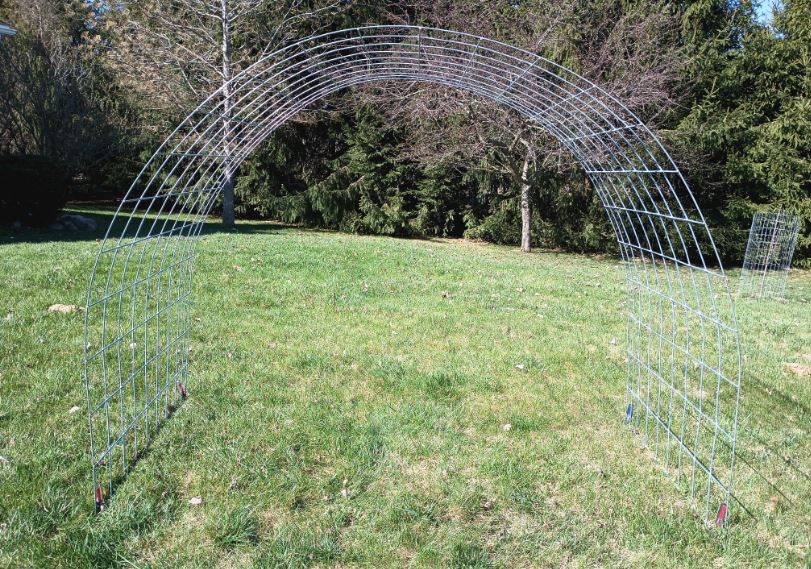
Most of our cattle panels end up as a plant growing structure and usually an arch shape. These recent ones are slated for a cattle panel greenhouse build. As long as they can be used in a fairly symmetrical arch that is considered success.
Transporting a cattle panel this way certainly has its limitations. Depending on vehicle size, it’s pretty much limited to one panel at a time and requires a little more work than using a truck or trailer. But if those aren’t options then this method is a great way to get the cattle panel to where it belongs.